
Nextcloud + Hetzner Storage Box
Connect Hetzner Storage Box to Nextcloud in minutes. Use Hetzner Storage Box as primary storage.
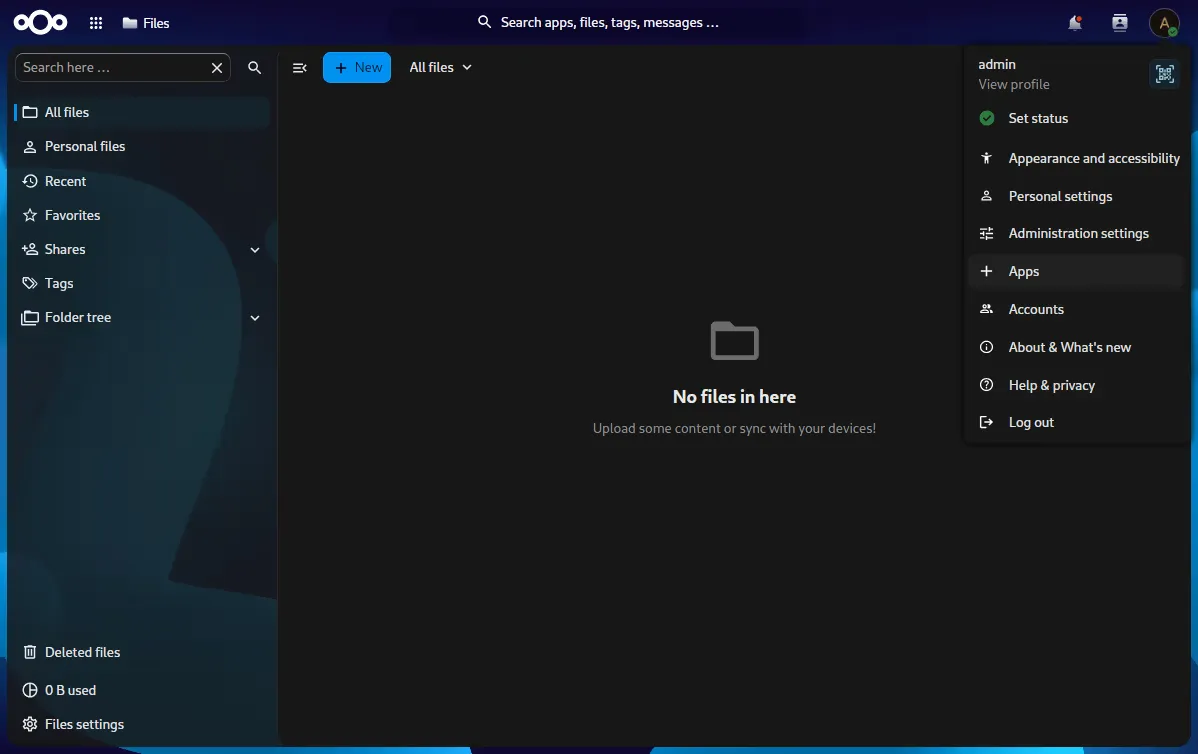
Step 1: Open the Apps Menu
Log in to your admin account. Click the profile icon in the top right corner, then click Apps.
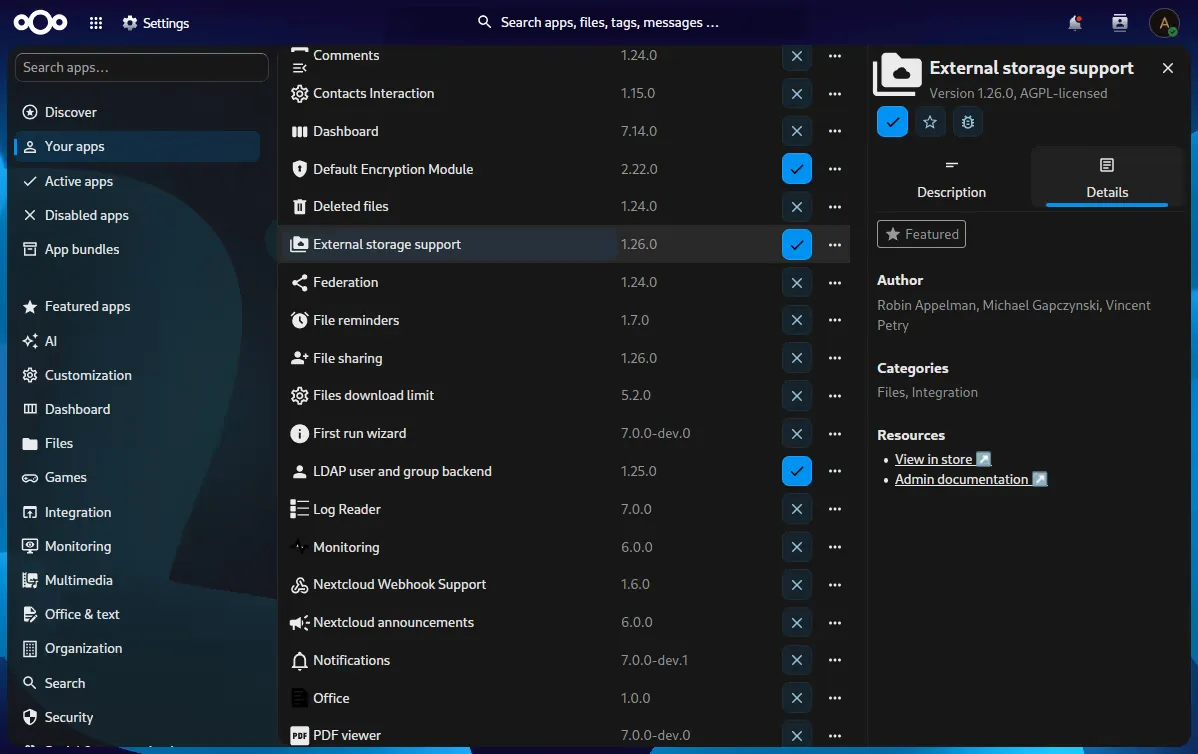
Step 2: Find External Storage Support
Click Your apps in the left menu. Look for External storage support and turn it on. If it’s not there, use the search bar to install it.
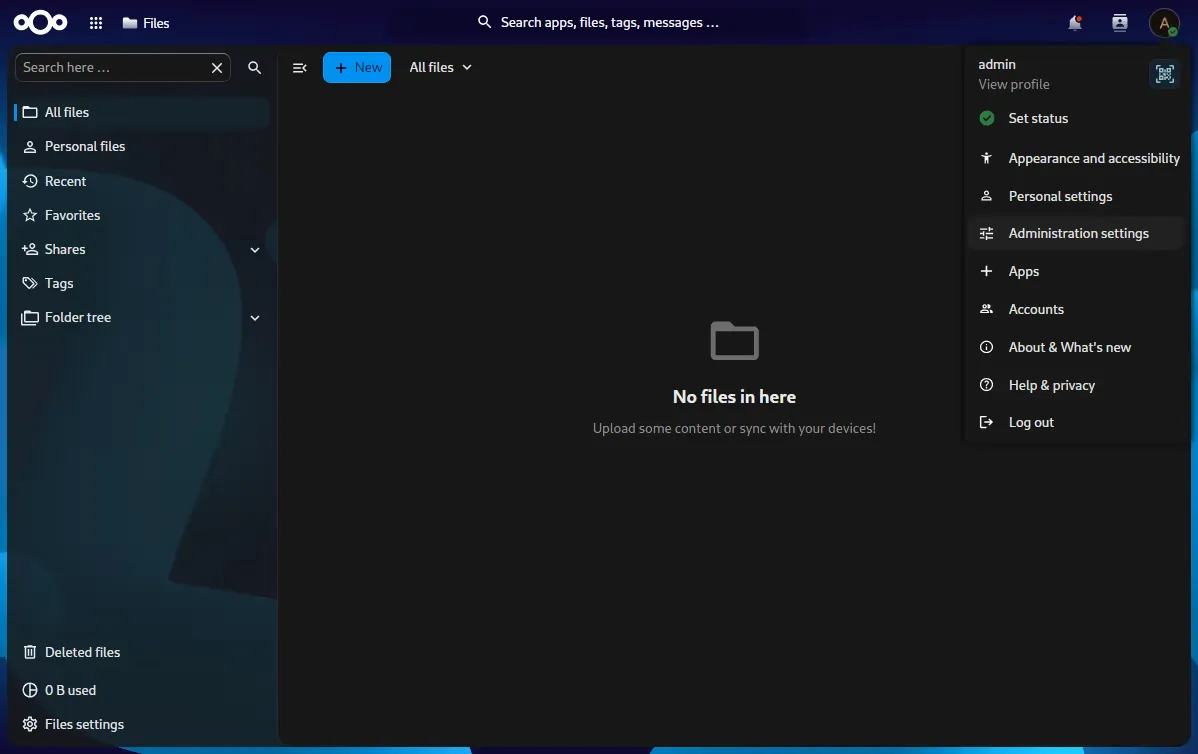
Step 3: Go to Settings
Click the profile icon in the top right corner, then click Administration settings.
Step 4: Add External Storage
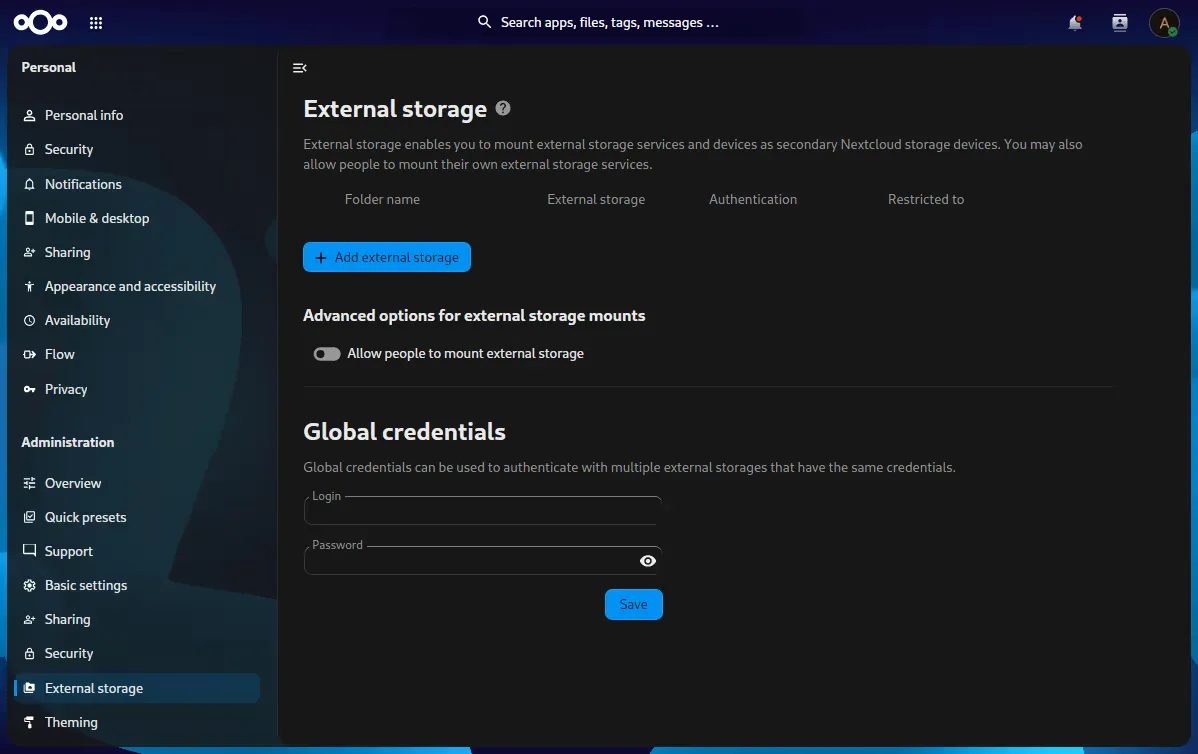
Click External storage in the left menu. Then click the + ADD external storage button.
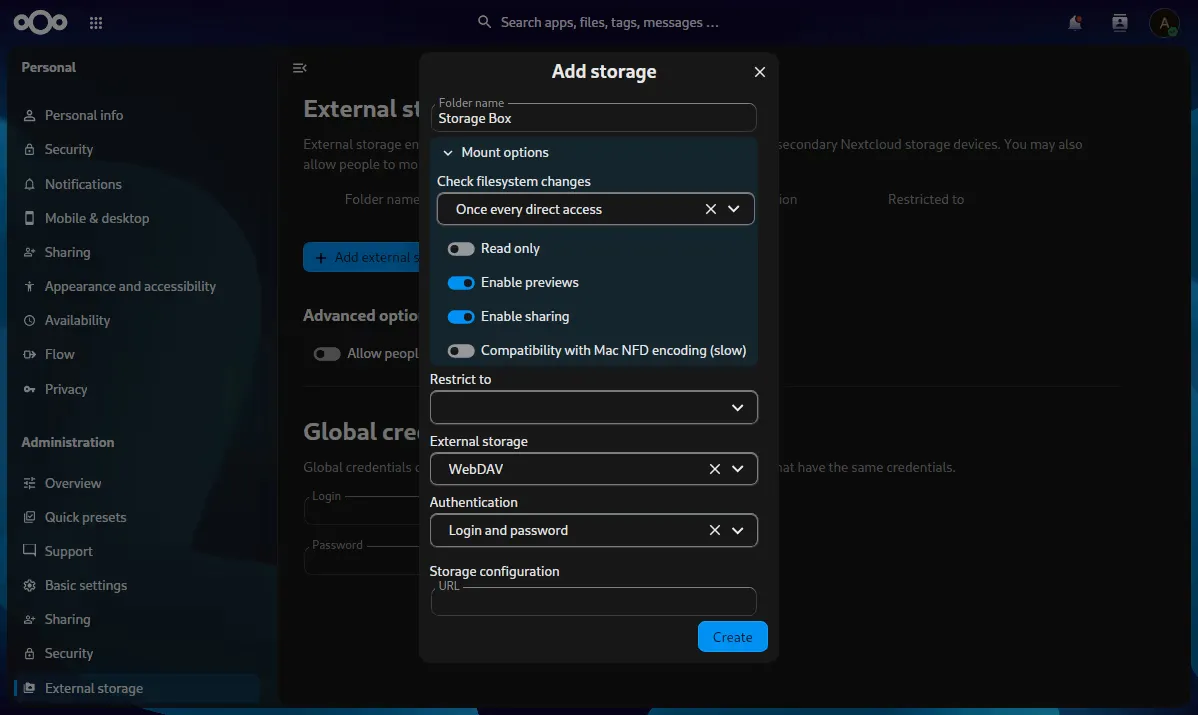
Folder name: Storage Box
Mount options:
- Check filesystem changes: Once every direct access
- Read only: No
- Enable previews: Yes
- Enable sharing: Yes
- Compatibility with MAC NFD encoding: No
External storage: WebDAV
Authentication: Login and password
Step 5: Create a Hetzner Storage Box
Create a new Hetzner Storage Box. Turn on WebDAV and external reachability.
Step 6: Create a Subaccount
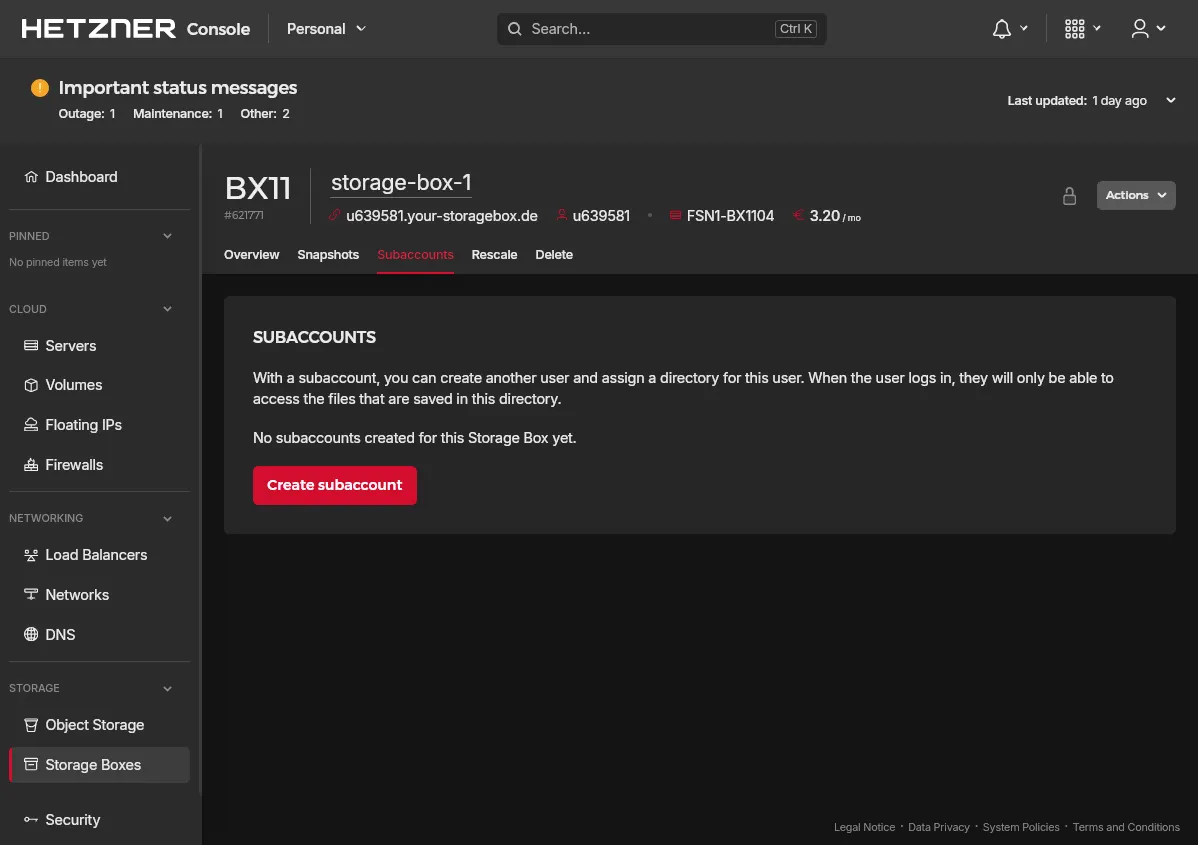
Go to the Subaccounts tab and click Create subaccount.
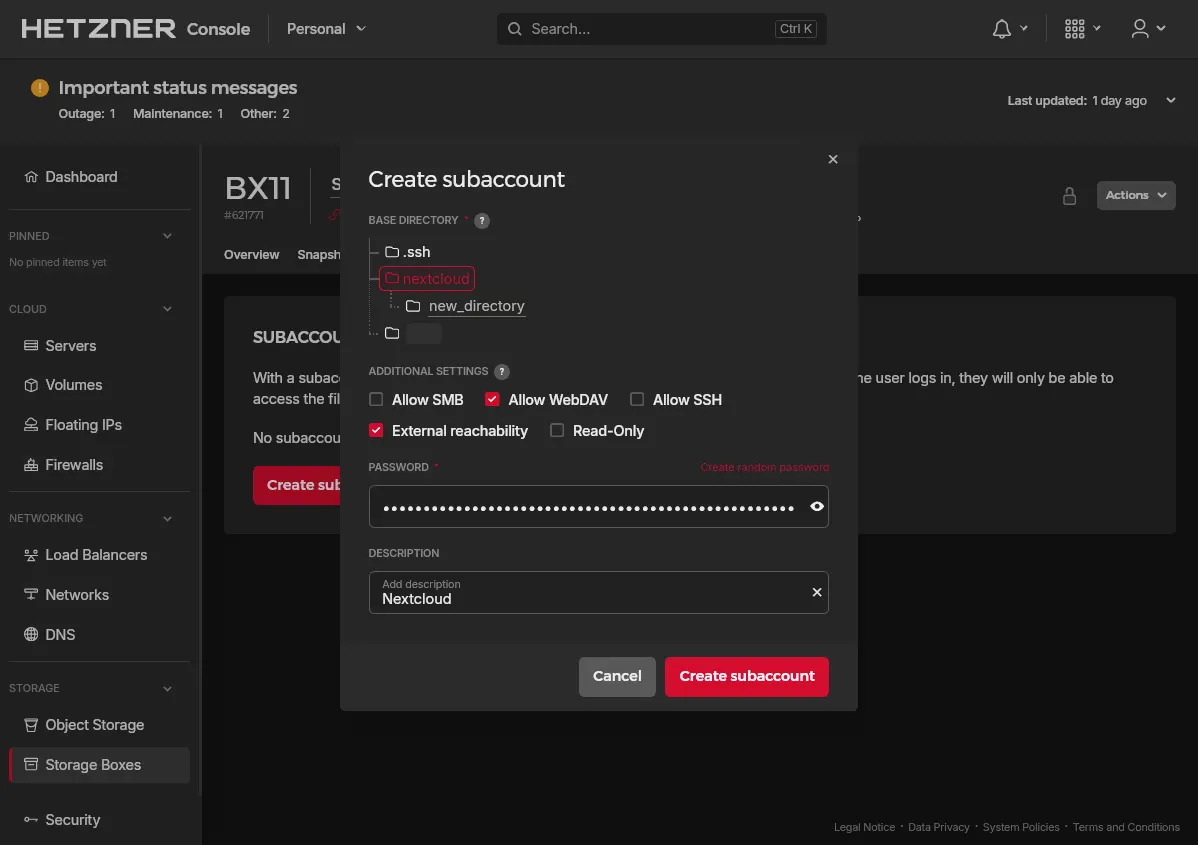
Base Directory: Create a new folder named nextcloud
Fill out the form with these settings:
Additional Settings:
- Check “Allow WebDAV”
- Check “External reachability”
- Check “SSH” (optional)
- Create a password longer than 64 characters and save it to a text editor
Click Create subaccount when done.
Step 7: Get Access Details
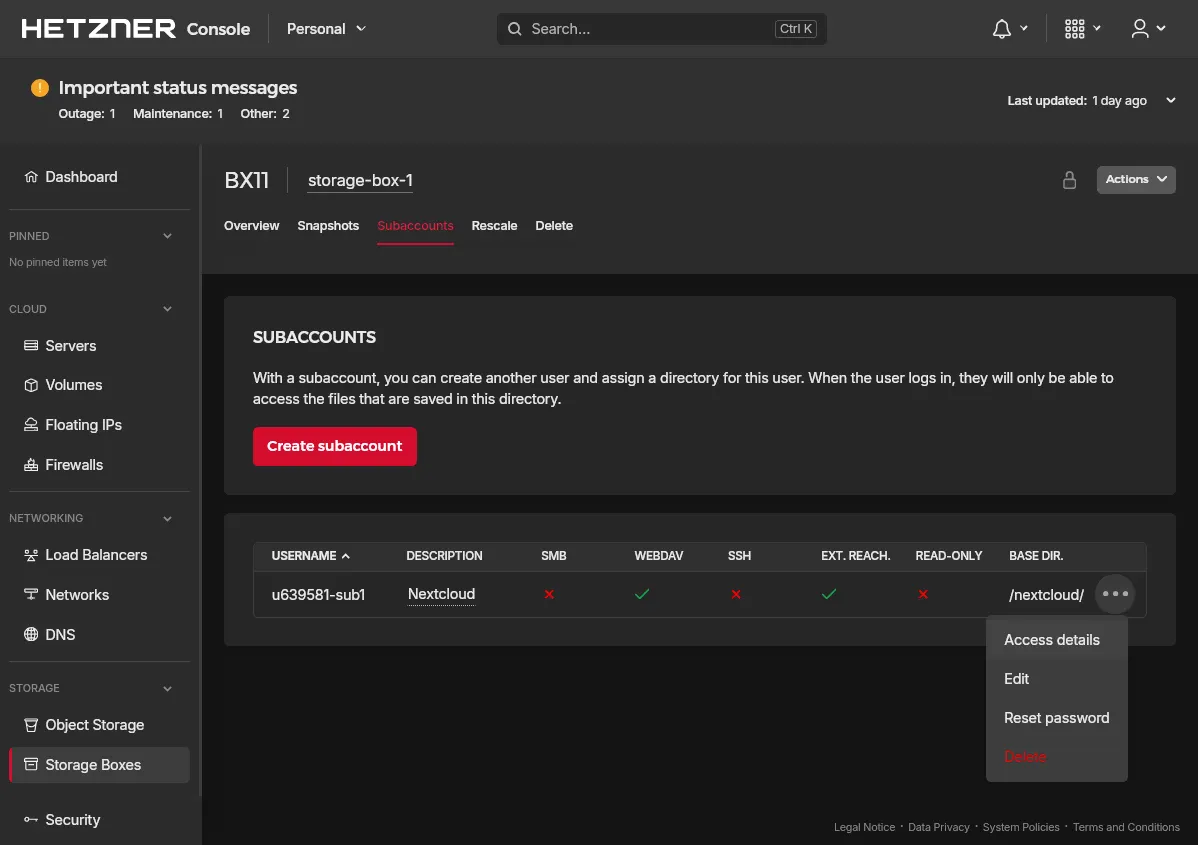
Click the three dots next to your subaccount and click Access details.
Step 8: Copy Your Information
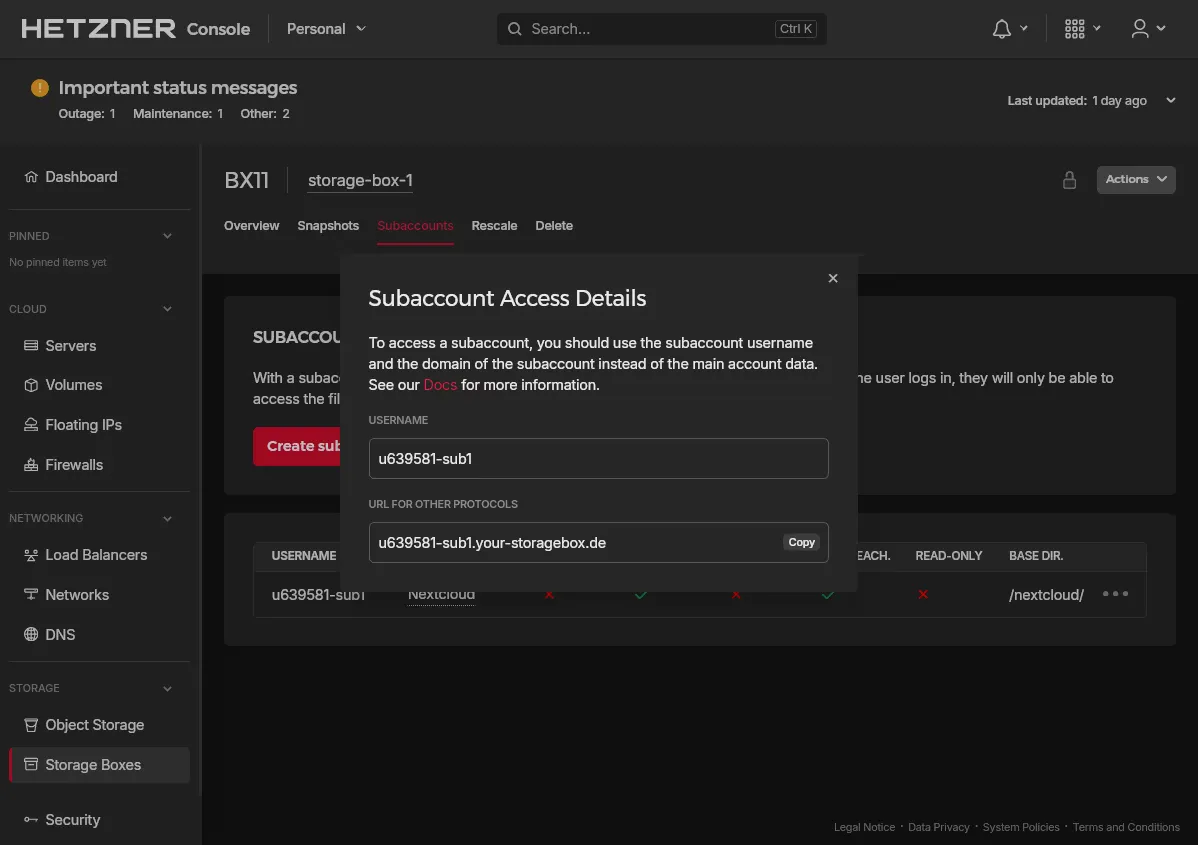
Copy your USERNAME and URL FOR OTHER PROTOCOLS to a text editor.
Step 9: Fill Out the Nextcloud Form
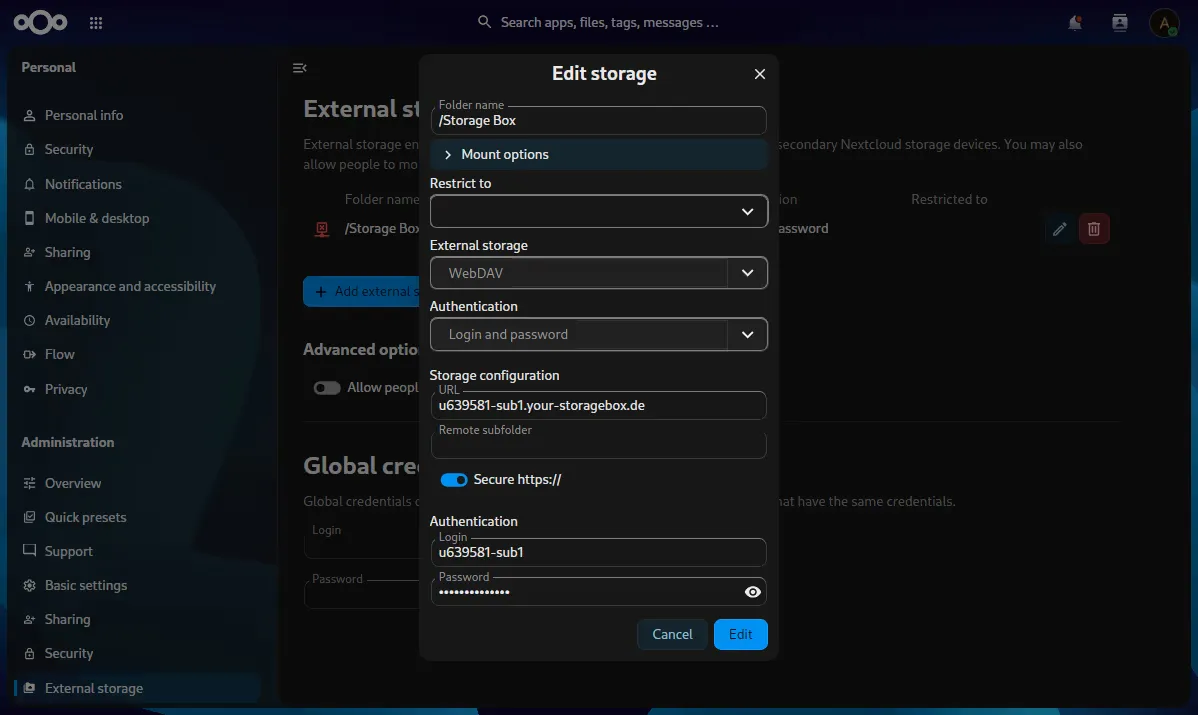
Go back to Nextcloud and fill out the rest of the form.
Storage Configuration:
- URL: (Use the subaccount URL FOR OTHER PROTOCOLS from Step 8)
Authentication:
Click Create to finish.
Step 10: Check the Connection
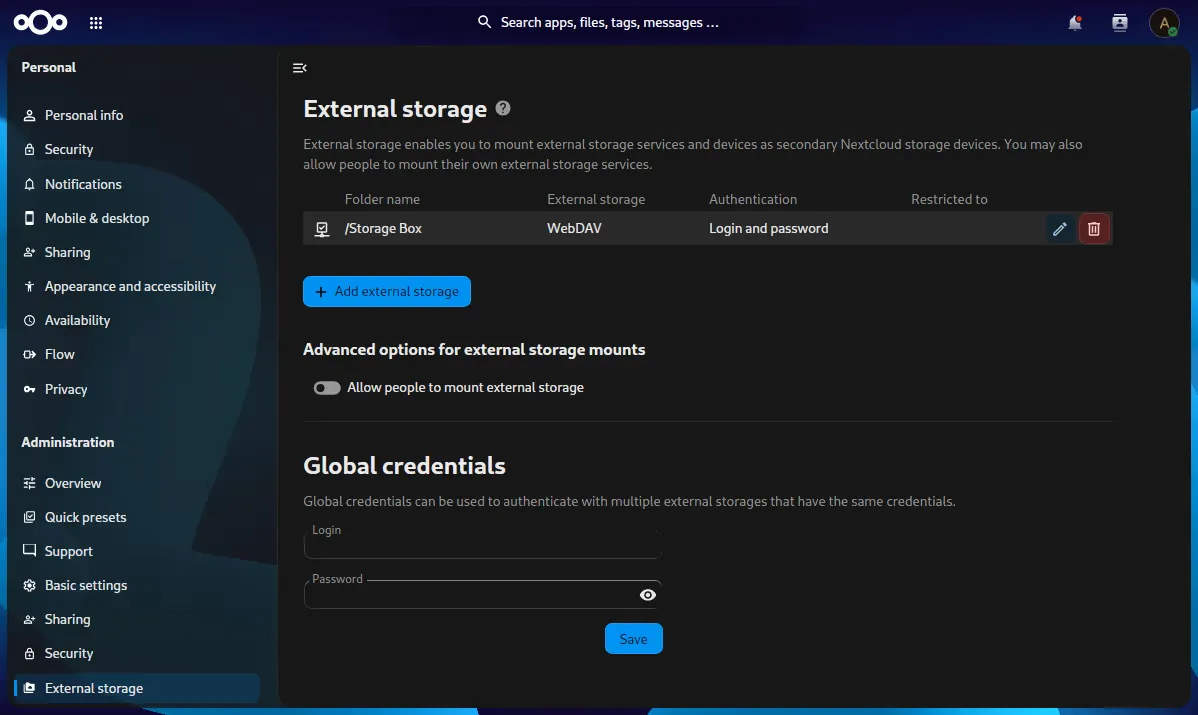
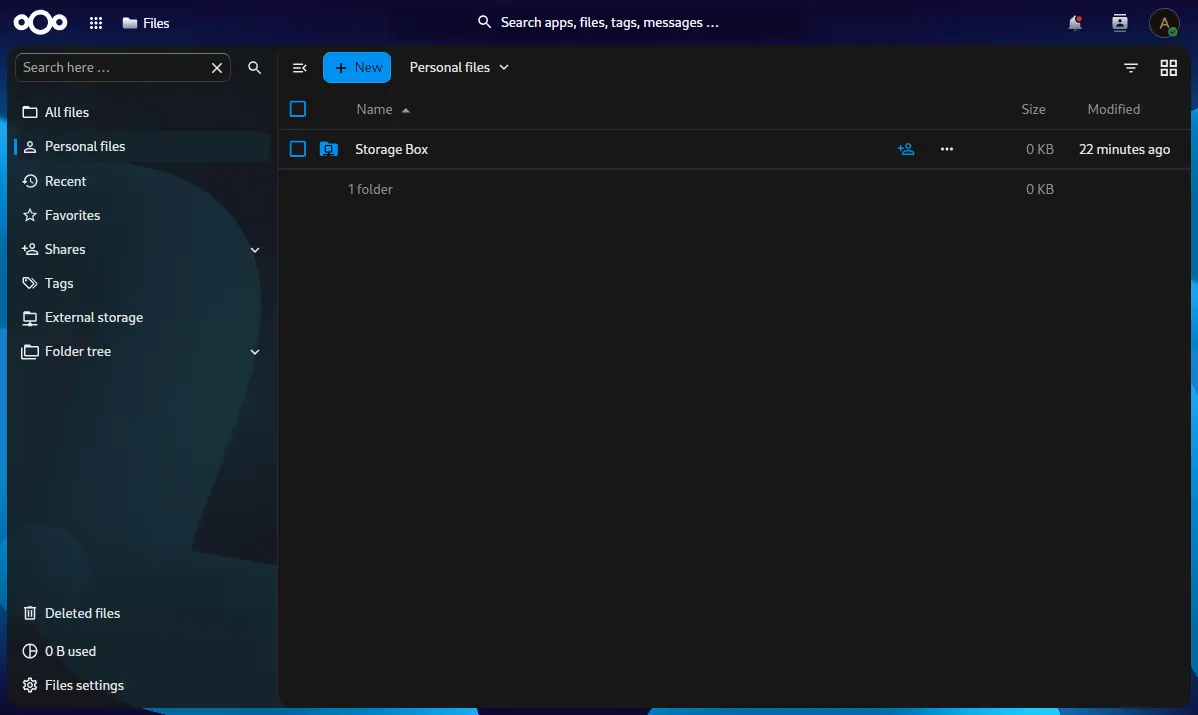
You should see a white computer icon next to “Storage box”. This means you are connected Hetzner Storage Box to Nextcloud. If you see a red icon, there is an error.
Step 11: Use Your Storage
Go to your Nextcloud home page. You will see a new folder named “Storage Box”. Double click it to open it. Any files you put here are stored on Hetzner Storage Box.
Step 12: FileZilla + Hetzner Storage Box
Upload a test file to the Storage Box folder in Nextcloud. Then use FileZilla to check if the file is really there. This works both ways. If you upload files in FileZilla, they show up in Nextcloud. For big files, I recommend using FileZilla instead of the browser because browsers time out.
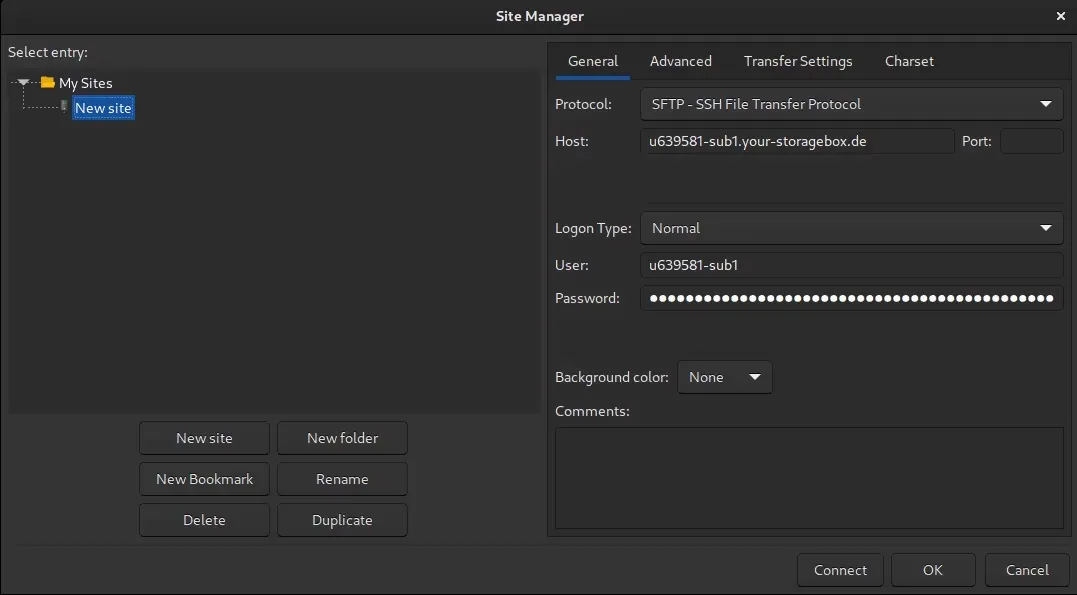
To connect to Hetzner Storage Box in FileZilla, turn on “SSH” for your subaccount if you haven’t already (see Step 6). Then open FileZila and create a new conncection.
- Protocol: SFTP
- Host: (Use the subaccount URL FOR OTHER PROTOCOLS from Step 8)
- Logon Type: Normal
- User: (Use the subaccount USERNAME from Step 8)
- Password: (Use the subaccount PASSWORD from Step 6)